19 Aug 2020
Even light scratches can be visible and ruin your car’s look. Luckily, scratches are easier to fix than you think. There are several ways to remove scratches and make your car look as good as new. So before you head to the mechanic, check out these DIY scratch removal tips.

First, check the depth of the scratch
In order to know how to fix the scratch, you need to figure out how deep it is. An easy way to check this is with the fingernail trick. Lightly go over the scratch with your nail and see if your nail catches on the scratch. If it doesn’t, it means the scratch is superficial and an easy fix. But if your nail catches, removing the scratch will be a bit of a challenge.
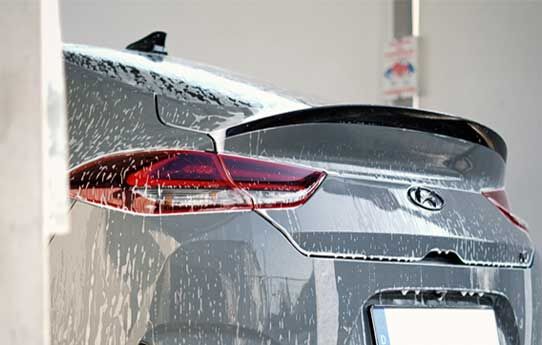
Next, clean and dry your car
To remove the scratch, you first need to make sure the car’s surface is clean and dry. Dirt and debris can actually make the scratch worse, and that’s the last thing you want. So once you’ve done that, you’re ready to tackle that scratch!
How to remove light scratches on your car
If your nail doesn’t catch on the scratch, then you might be able to fix it with some toothpaste. Whitening toothpaste generally works best because of its high abrasiveness.
- What you’ll need:
- - Toothpaste (preferably whitening toothpaste)
- - Microfiber towel
- - Car polish or car wax
After washing and drying the scratched area, apply a small amount of toothpaste on a damp microfiber towel. It’s important to use a soft microfiber towel so it won’t damage the paint.
Next, use the damp towel to rub the toothpaste onto the scratched area. Rub it lightly in a circular motion to remove the scratch.
Once you’re done, remove the excess toothpaste with water or a wet microfiber towel. If the scratch is still visible, repeat the process one or two more times. You shouldn’t repeat any more than that, because there’s still a chance of damaging the paint.
To finish it off, apply car polish or wax with the microfiber towel to make your car shine like it’s brand new.
How to remove deeper scratches on your car
If your fingernail slightly catches on the scratch, you might be able to remove it with sandpaper.
- What you need:
- - Sponge
- - Sandpaper (3,000 or 5,000-grit, depending on the depth of the scratch)
- - Microfiber towels
- - Car polish
- - Car wax
First, get 3,000-grit sandpaper and wrap it around the sponge. If the scratch is on the lighter side, you can use 5,000-grit sandpaper instead. Wrapping it around the sponge makes sure you don’t put too much pressure on the paint. It’s important to be gentle when using sandpaper, or you could damage the paint further. Just like with lighter scratches, don’t forget to check if there’s dirt or debris near the scratch.
Next, apply soapy water on both the scratched area and the sandpaper before you start sanding. The sandpaper and sponge should both be wet throughout the whole process to prevent any additional damage.
When you sand, make sure you’re sanding in the direction of the scratch. Sand for a few seconds, check the scratch, and repeat. You want to keep checking to make sure you don’t sand deeper than necessary. Sand the area until the scratch is almost invisible, then put the sponge away and continue sanding the scratch until it’s as good as gone.
The area you sanded will no longer be glossy since you sanded off the upper layer of paint. To feather out the edges of this now matte area, use the 5,000-grit sandpaper and softly continue sanding around the edges in circular motions. Afterward, wipe the area with a clean and dry microfiber cloth.
Now you’ll need a car polish specifically made for removing marks and scratches. Apply a small amount on a polishing cloth or microfiber towel and polish the area in circular motions. You should also polish a bit outside of the scratched area in order to make sure everything blends in.
Polish the area until it looks almost as glossy as the rest of your car, and then wipe the area with a clean microfiber towel. Check your work — you can always repeat the process if you need to. Also be sure to remove any excess polish before it dries.
Last but not least, finish it off with some car wax. Put some wax on a clean microfiber cloth and apply it in circular motions. Once it looks all glossy and shiny, give it a minute to let it dry and wipe it with a clean and dry microfiber towel. Your car should look as good as new.
How to remove deep scratches on your car
If the scratches are deeper, you’ll need to use a compound to remove them. Since there are several kinds of compounds, it’s best to do a little research to purchase the right one for the scratch.
- What you need:
- - Polishing compound or rubbing compound, depending on the depth of the scratches
- - Compound pad
- - Car polish or car wax
- - Microfiber towel
Before starting, you need to know whether to use a rubbing compound or a polishing compound. If the scratch on your car barely catches your fingernail, a polishing compound should do the job. There are specific polishing compounds made to remove scratches from cars, so that would be the best option. If the scratches are larger and deeper, a rubbing compound would be the better choice. However, rubbing compounds use harsher chemicals so it’s advised to try mild formulas before moving on to a rubbing compound.
To play it safe, test the compound on a small area of your car before using it on bigger areas. Some compounds can be very abrasive and could be more powerful than expected.
Once you decide on the product to use, apply a small amount of the compound onto a damp compound pad and rub it on the scratched area in circular motions. The compound pad needs to stay damp to prevent further damage.
While you can compound your car by hand, if you have experience using a dual-action (DA) polisher, you can use that instead. DA polishers are faster and easier to work with if you need to apply compound on a large area.
After you finish compounding the car, clean the area with a clean and dry microfiber towel and check your results. If the scratch is still visible, repeat the process once more — but make sure not to apply too much pressure, since the area has already been treated.
Once you’re happy with the results, use car polish or wax to revive the shine. Apply a small amount of polish or wax on a clean and dry microfiber towel and polish the area until it looks shiny and new.
Final reminder for DIY scratch removal
You’re now ready to take on scratches yourself. The most important thing is to check the depth and size of the scratch so you can choose the right method: toothpaste for light surface scratches, the sandpaper method for slightly deeper scratches, and a compound (polishing, then rubbing) can help with deep scratches. No matter the method, always make sure your car is clean and dry before trying any DIY scratch removal, and test out each method on small areas of your car before using it on bigger areas. Go on, it’s time to make your car look its best.